

So, welcome to crafty Tuesday! Craft supplies were acquired, a lovely hostess kindly offered a house and large table, pizza, nibbles and cheese were bought, cake was made, tea was brewed, chat and laughter was had, crafty heads were put on and then we were off.

All of us have made Christmas cards before and we had an interesting swap of ideas and previous designs. We decided that what we needed this time was to focus on simple, quick and effective ideas. That way we would be able to make a large number of cards whilst still enjoying a creative making process. Squashing down our more is more urges was quite difficult but was the difference between making 2 cards in two hours or 22 cards in the same time.
Materials wise we had card blanks, assorted craft papers in red, gold and green in a variety of finishes, Christmas rubber stamps, buttons, ribbons, Christmas shape cutters, bauble templates, scissors, glue, glitter glue, pinking shears, wooden shapes and metallic pens. We made a big pile in the middle of the table and shared our resources, using some items we already had and some that we bought specially. You can just see my overflowing ribbon tin (one of them!) and the plate of cake! It did not cost us a lot for materials which is always helpful!
Some of the images are a little dark, it has been so overcast and grey that it has been hard to take good photos. I have done my best with white sheets and lights, they are good enough to get the idea!
Here are some of the cards:

So simple! The left on has a background of flock paper (I love flock paper so much, I was overjoyed there was plenty in the pack), the right is a red glitter pattern. Cut them out with pinking shears and position centrally. Then add a wooden reindeer, bought from a craft shop in a pack of 4 for a couple of pounds. Done!

Button baubles. Choose your buttons, vibrant colours, pastel colours, all one colour, same size, different sizes, the choice and combinations are endless. a tip is to use flat bottomed ones as they stick better. Arrange your buttons first in a order and height arrangement that is pleasing. They look better at varied heights, like they are on different length ribbons. Then stick down and leave to dry. Use a metallic pen to draw on a ribbon or glue on real thin ribbon.


To make these cards I used a bauble template that my friend had drawn. I drew around the template onto a variety of different papers; gold glitter dots, red flock (yum yum), gold embossed, glitter snowflake etc. Cut out the bauble, put glue on the back, stick on the lower third of the card. Then draw on the hanging thread with metallic pen or use ribbon. This would work really well with any kind of Christmas shape - think bells, stars, trees, holly leaves, snowflakes, reindeer, string of lights, angels etc.


I couldn't resist these wooden deer, they are on the boundary of a bit kitsch for me but I really like them. They come with a self adhesive dot on the back so once you have chosen your background paper you just take the backing paper off the glue dot and stick them down. Really easy!
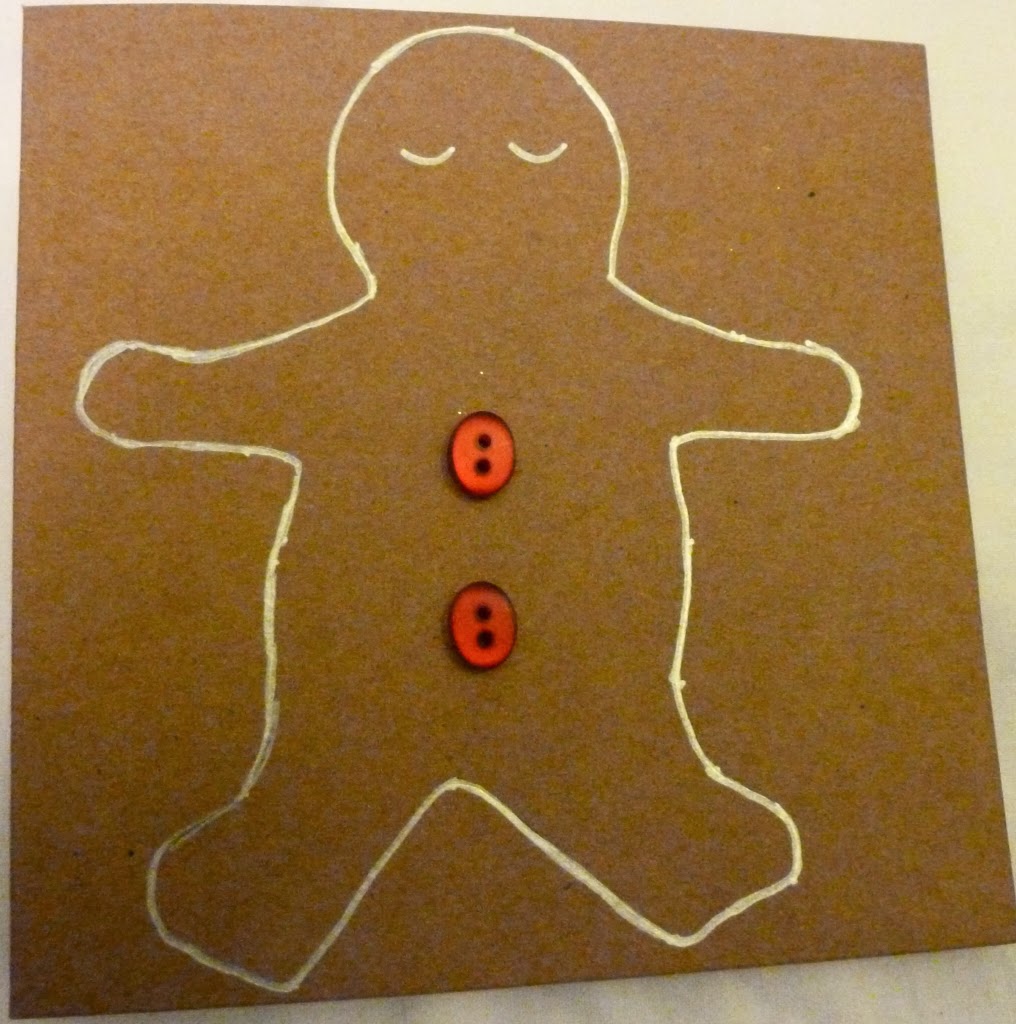
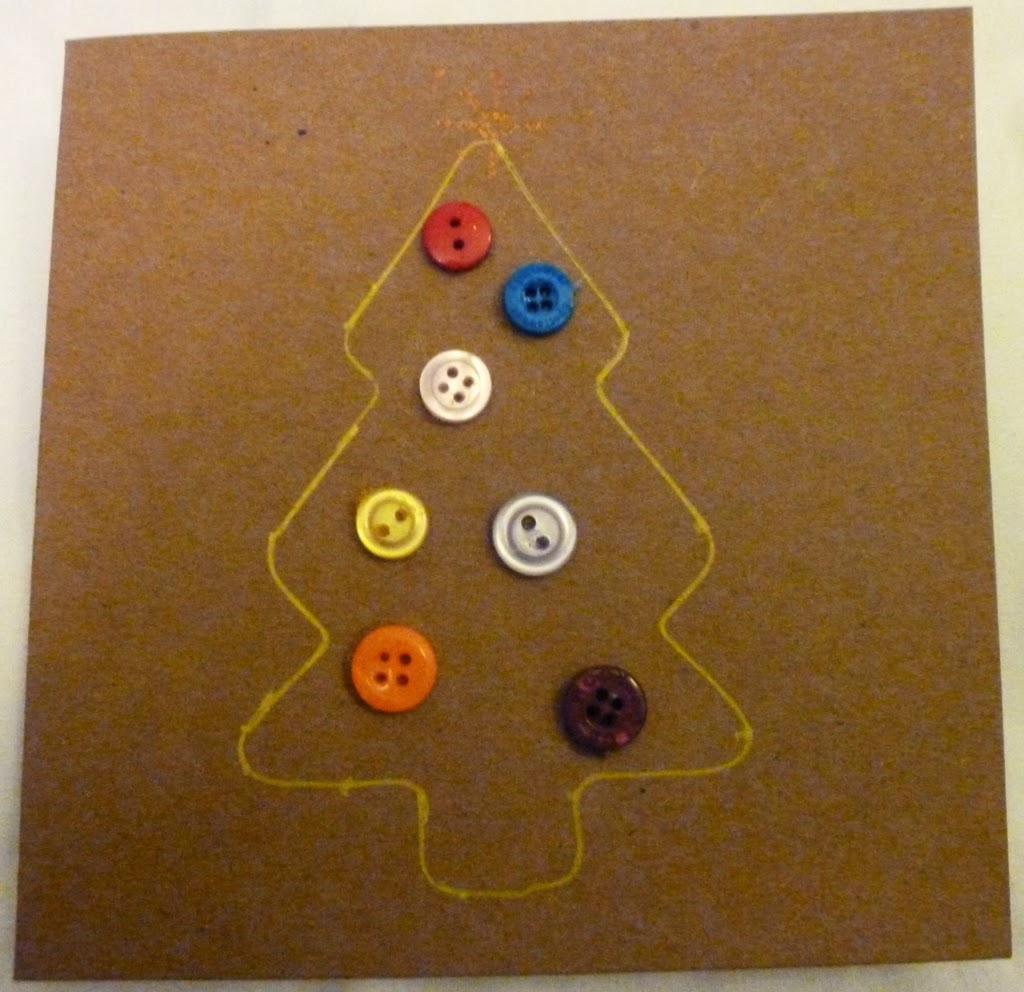
Grab yourself a festive shaped biscuit cutter and get making! Here I have drawn round a gingerbread man cutter and a tree cutter and then decorated them with lovely buttons. I used a star stamp for the top of the tree, start shaped buttons would also look good. Top tip - don't draw around the cutter with a metallic pen, it leads to smudging and bleeding lines no matter how carefully you do it. After several errors I had the genius idea of using a pencil to draw around the shape and then going over it with the pen. Hey presto! No mess. Sometimes primary school ways of doing things work well for a reason!


Like before, these wooden baubles are from a craft store and I thought they were really cute. They work well in odd numbered groupings and on a variety of backgrounds.

Here is my friend's lovely button tree. It looks so effective. She filled in the gaps with copious amounts of glitter glue so it is nice and sparkly too! It would be possible to draw outlines of other Christmas shapes and fill them in with buttons, simpler shapes are easier to deal with.
There we are, a selection of handmade Christmas cards that were fun to make, are effective and didn't take too long. We had so much fun, we laughed so much and enjoyed looking at each others creations and bouncing ideas of each other. I heartily recommend a lovely evening of making as a way of having a get together. In fact, we enjoyed crafty Tuesday so much that we repeated it a week later to make more cards. (Get well soon poorly friend who missed it).
Fabulously festive, lovely cards! I especially like the dangling button ornaments. Health permitting (which it wasn't this year), I adore making my own Christmas cards, too. I think the trick is to start in January, not mid-November, if I'm to get them all done and out the door in time for Christmas. :)
ReplyDelete♥ Jessica
Thanks Jessica. I agree, early starting is the best plan, yet hard to achieve somehow. Though just after last Christmas I made some decorations as presents for this year as I was in the festive mood. I have been grateful for as it took some pressure off my gift list!
DeleteThese are great - I especially like the one with the button baubles hanging at different lengths, it's very effective. x
ReplyDeleteThanks Gillian. I can't claim design rights as my friend described something similar that she had seen in a magazine which set off the idea. It was really pleasing to make.
Delete