

I am taking a break from knitting adults garments as there is a flurry of babies around here at the moment! This is lovely and very exciting but it is somewhat dictating my knitting choices! However, it gave me a great reason to dig through my vintage baby patterns. Whilst I was admiring the many gorgeous designs I made two decisions. The first was that I wanted to use vintage patterns which would not look overtly vintage when knitted in a modern yarn. This was because the babies that I am knitting for do not have vintage loving parents and I didn't want to frighten them with a full on 1940's pilch and pram outfit. The second was that I was going to knit them all in MillaMia yarn, choosing the bright green shade 'grass' for this coat.
If you don't know this yarn it is a Scandinavian brand of 100% extra fine merino wool which comes in an amazing array of colours and is so, so soft. Their pattern support is amazing. It knits as a 5-ply, so between a 4-ply and a double knit. I found that I had a good number of old Patons and Baldwins' patterns that use their yarn called Quickerknit. After flicking through several of the patterns I found a reference to Quickerknit being more than a 4-ply and less than a double knit so I thought that the MillaMia would be spot on. It can be hard to match up modern and vintage yarns when only a brand name for the vintage yarn is given. Sometimes it is educated guesswork going on needle size and the type of garment. So it is always nice when you find out exactly what sort of yarn would have been used originally.


The pattern I used is shown on the baby on the bottom right. This is the start of the back. It has a moss stitch band, then stocking stitch with regular lace inserts to form a patterned panel at the bottom. The yarn is a far more vibrant shade of green than the first photo, more like the second, I found it hard to get photographs showing the true colour.

This is the completed back. After the armholes have been shaped the last stitch on each row is slipped onto a stitch holder. The back, sleeves and fronts are joined together using laced joinings.


These three pictures show from the top - the right side laced joining, the wrong side laced joining and a sleeve inserted by laced joinings. To do these the stitches at the end of each piece (e.g. a sleeve) are slipped onto a stitch holder until needed rather than cast off. When the time comes to say, attach a sleeve to the back, the sleeve stitches are slipped from the holder onto one needle and the back stitches are slipped from the holder onto another needle. The needles are held side by side and a third needle is used to slip a stitch off each needle and to pass the first stitch over the second to cast it off. It is a bit like plaiting the stitches. It is tricky at first as holding the needles feels uncomfortable but is really neat when you get the hang of it and gives a lovely finish.

This is a close up of a sleeve inserted using laced joinings. The sleeves have moss stitch cuffs.

Here are the various parts of the coat.

This is the coat laid out once all the laced seams have been completed. This leaves the side and sleeve seams to sew up.

This is the view of the back once the sewing up has been done. The moss stitch borders at the bottom are not sewn up and form side vents.

This is the completed coat from the front. The button and neck bands are completed during the making up process.
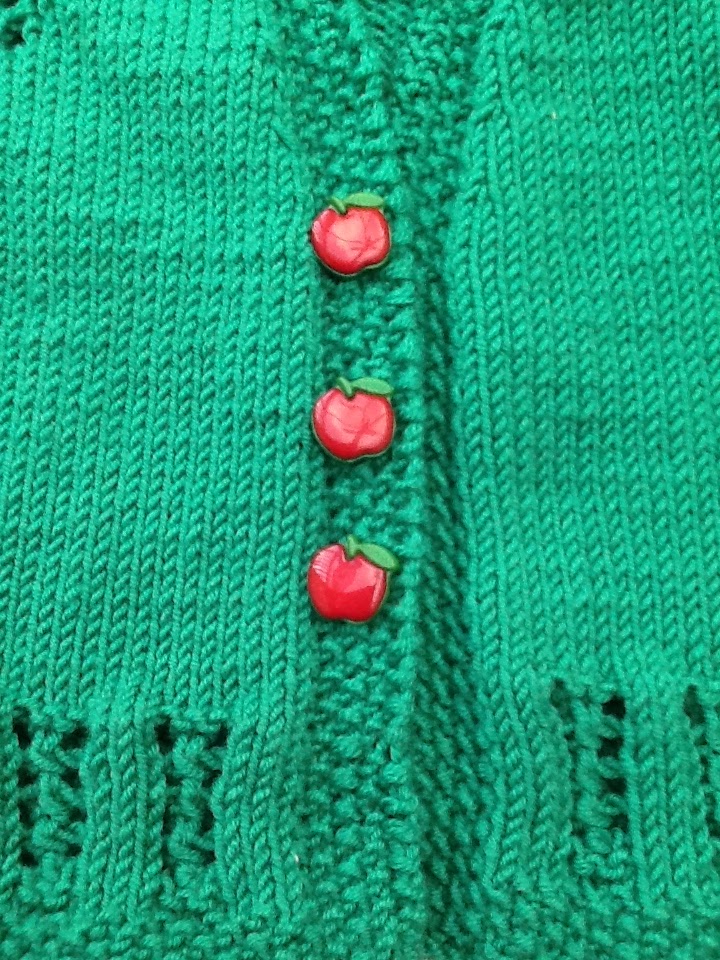
I found these gorgeous shiny apple buttons to finish the coat off! I love them and thought a baby would too. I sewed them on super securely!

Here is the coat wrapped and ready to go to its new owner! I thought the teddy bear ribbon was divine!