Over the past month and a half I have been using Pinterest to put together a board on vintage Christmas'. I have been looking at photographs, gift wrap, decorations, adverts and, of course, Christmas cards. I have concentrated on the 1950's and 1960's but if I have liked it I have pinned it! Whilst looking at the cards I realised that they are actually a great source of vintage fashion, something I had not really considered before. Obviously, some are stylised and some reference a period later than the one in which they were produced but amongst those are the ones that capture the time in which they were made perfectly. If you want to see more, here is my board, The ghost of Christmas past.
So, I decided to put together a selection of the marvellous outfits that can be found on these cards. If my vintage wardrobe was extensive enough and if money was no object and perhaps if the weather was snowy this is what I would be wearing over this festive season.
Such a simple illustration using a limited colour palette to such great effect. How glamorous and festive is this lovely 1950's Christmas shopper? A lovely thick (maybe fur) white jacket, cosy turned up collar and wide turned up bracelet cuffs. It should be nice and warm in the snow. It looks like it is fastened with a gold brooch - a nice styling tip there! Accessorised with long black gloves, a black beret and stud earrings. Gorgeous!
Unfortunately I did not have an outfit like this to wear whilst hanging the baubles on my Christmas tree. It is very glamorous but if you break it down into separate garments it is surprisingly easy to recreate. A crimson skirt is always festive, make it a circle skirt with a petticoat underneath and you have a winner. The sash can be recreated using wide satin ribbon. Polka dot tops are reasonably easy to come by, or you could make your own from an original 1950's pattern if sewing is your thing. Finish off with red heels, red lipstick, a choker and set hair. Lovely!
A change of period here and a softer look, bathed in candlelight. A full length shell pink silk dress with double flounces at the sleeves. It is almost impossibly elegant. A red ribbon sash and a red ribbon at the neck line are the only other details. What I really like is how it is all accessorised with the most Christmassy of plants - poinsettias. These could be made out of felt or fabric and turned into hair decorations or even a cocktail hat to help recreate this look. Just beautiful!
I really want this dress, it is simple but stylish and I am a sucker for a green polka dot! I love the big, big skirt, either double layered plain then polka dot fabric, or with a polka dot petticoat if such a thing exists! It has a very demure look with the high neckline, the pussy cat bow and the three quarter length sleeves. Add long white gloves and simple black heels and you are good to go. Spot those poinsettias again. Fabulous!
How great would it be to have an outdoor outfit like this? It truly is an outfit, not just a coat to keep out the cold. I think I need to look for something which has this effect. It has to be said that white coats do look beautiful despite being a little impractical unless constant dry cleaning is an option. I love this fitted bodice and swinging skirt trimmed with black wool, maybe Astrakhan or fur. A great big hand muff for toasty fingers, a warm fur collar and a matching hat. The white pom pom is a lovely touch. I guess she isn't dealing with the worst of winter weather as she strides out in those white heels but they do compliment her outfit perfectly. The colour pop from the red handbag is so stylish. Perfect!
Another Christmas shopper striding through the snow with a teetering tower of parcels and a dog!? I think this is a fantastic use of festive reds and greens without being over the top. The green coat is lovely but it is the lining which caught my eye, those green polka dots on a yellow background. Sadly we can't see much of the red dress but it looks to have a pencil skirt. I can't decide if it is a pinafore dress with a white shirt underneath or if it is a white scarf. The red hat is so cute, I think I have a knitting pattern for something pretty similar so I am going to have a go at that. Fantastic!
I just love this, it is so simple and so glamorous. I am far too messy to wear an all white outfit but I can dream! From the white knitted bonnet trimmed with gold stars, to the lovely fluffy hand muff to the beautiful circle skirt it is just perfection. I love the gold and red holly trim on the skirt and I think it would be possible to at least recreate this part of the outfit by embroidering the design onto a plain white circle skirt. Glorious!
Apart from the lovely outfit catching my eye I was also taken by the poodle! I do love a 1950's poodle, in all shapes and sizes. Candy canes are clearly the influence behind this outfit and why not take your inspiration from confectionery at this time of year?!The black beret with three gold circles is a nice touch as is the striped and fringed scarf. Again, I love the full skirt and the overall shape of the outfit. Marvellous!
I am not always a massive fan of pink but I could not resist this dress. It is partly the shape, lovely circle skirt, fitted boat neck bodice which falls into a cowl. It would be a fantastic party dress, maybe I wouldn't be wearing it to hang my decorations like she is. Then again, if I had it, I might well wear it every day just to enjoy it, regardless of the occasion. It is finished off with long black gloves and little pink shoes. I do like a bit of matchy matchy! Her headpiece looks a bit like it is made from ribbon and fur cones. With a headband and a glue gun this could easily be achieved. Superb!
So, not a serious outfit, lacking the elegance and glamour of some of the others but how much fun is this?! It could easily be made if you were in need of a seasonal fancy dress outfit. It cleverly references the tree shape, a plain green dress in the correct shape could be adorned with baubles or brooches for a subtler take on the look. Finish with gold beads and make a star headband to top it off. Magnificent!
Wishing you a very merry Christmas!
Monday, 23 December 2013
Saturday, 21 December 2013
P&B bolero - without ravel
The title of this post is the title of the garment in the pattern booklet. It is a play on words referring to the piece of music bolero by the composer Ravel. A knitting joke I guess?!
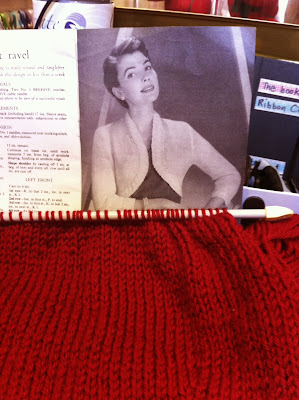
I chose lovely festive red in Wendy merino chunky. It is 100% merino wool and is so soft and squidgy. I don't think any of the photos quite do the colour justice, though the one below is close. It is a soft crimson red rather than an harsh orange red and is just lovely.
So here it is knitted up. It fits about a 34-36 inch bust, the pattern, like many of the time, just comes in one size. The main bulk of the garment is knitted in stocking stitch. It has a border and sleeve cuffs which have a cable pattern on them. I love knitting cables, I was scared of them for such a long time, thinking they would be difficult. Once I got started though I found I really enjoyed knitting them, as long as you concentrate until you get the pattern repeat worked out in your head.
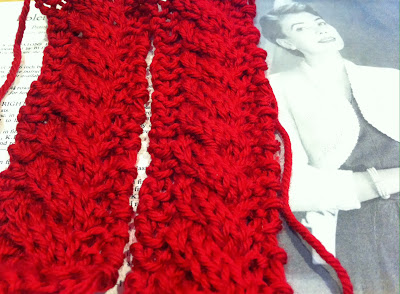
These are the cuff band in close up, waiting to be stitched on to the end of the sleeves. They make the sleeves fit really nicely around the wrist.
This is a close up of the border, I think it is such a pretty effect. It was fun to knit but a little daunting as it required knitting a strip more than 55 inches long! Good job that was only over 10 stitches.
I really like this style, cropped at the waist, fitted, accentuates curves that are already there and creates curves where there are none. Also, the bolero wouldn't detract from whatever beautiful dress you were wearing underneath.
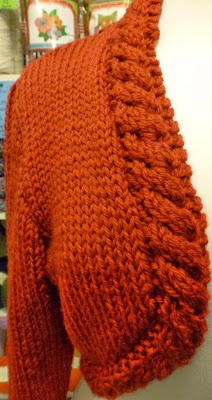
Sometimes it is nice to have full length sleeves, especially at this time of year to keep you nice and cosy. The border comes up around the back of the neck, keeping the drafts out there too!
Here is a view of the back, it has some nice shaping to it.
This shows the shaping at the back of the neck, making the collar sit closely around the neck.
So, there we have it. A lovely, chunky festive bolero, just waiting to be paired with the perfect dress to make a gorgeous outfit.
Friday, 6 December 2013
Patons and Baldwins C-793 Monkey Jacket
So, like me, you might be wondering what a monkey jacket is. Turns out it is one of these:
The one on the left. Isn't it fabulous? I was so pleased to find this pattern!
I don't know about you but I find the models verging on the edge of sinister! I think they are meant to be conveying a young, fun, glamorous spirit which at first glance they do. But, then look at their eyes! They are rolled right up and are giving you such a look! I wouldn't be surprised if laser beams shot out!
Anyway, back to the jacket. Monkey or not, it is a lovely cropped jacket which looks all warm and cosy. It is knitted in double knitting using the wool double. This makes a really squishy, warm fabric, thick without being heavy and it hangs really well. The pattern is a rib, slipping stitches on alternate rows.
This is my version, I used a teal wool/acrylic mix and knitted the smallest size, a 30" bust. I took the photos in my local gorgeous haberdashery, Ribbon Circus. It is my latest one to go into Lucy and the Caterpillar.
The pattern blurb tells you to 'notice the collar and the smartly shaped back', so here they are.
The darts at the back add a really pretty detail and pull in the jacket so that it fits closely and does not flare out at the back.
On the left the shoulder darts are visible, these add to the fitted look. The button is vintage and is teal covered leather. I found it in my button tin (one of them), and couldn't believe it was such a perfect match. I have several button tins, my one for modern buttons, one for vintage buttons, my grandma's button tin and one from a family friend. I love sitting sorting through them and it is very calming sitting letting beautiful buttons trickle through your fingers!
The sleeves are three quarter length with cuffs. The pattern is reversed when knitting the sleeves so that when the cuffs are turned the correct pattern is on the right side. I thought that was a really clever, neat touch.
I am really tempted to make this again for me as I really like how it has turned out and it would be such a versatile piece to have in one's wardrobe.
'Oh my! Look at my marvellous monkey jacket'!
Wednesday, 4 December 2013
Simple DIY Christmas cards
A few weeks ago a couple of fabulous friends and I hatched a plan for making some Christmas cards. It came about on a very jolly day trip to Manchester. We ignored all the big shops and went straight to the Northern Quarter, the home of small, independent shops and cafes and a fabulous craft centre full of treasures from designer makers who have their workshops there. Having got ourselves very excited in some craft supplies shops, oohing and ahhing over all the bits and pieces we didn't even know existed but now that we did know we found that we needed them, we decided that we could stock up and make a lovely, crafty mess making Christmas cards.
So, welcome to crafty Tuesday! Craft supplies were acquired, a lovely hostess kindly offered a house and large table, pizza, nibbles and cheese were bought, cake was made, tea was brewed, chat and laughter was had, crafty heads were put on and then we were off.
All of us have made Christmas cards before and we had an interesting swap of ideas and previous designs. We decided that what we needed this time was to focus on simple, quick and effective ideas. That way we would be able to make a large number of cards whilst still enjoying a creative making process. Squashing down our more is more urges was quite difficult but was the difference between making 2 cards in two hours or 22 cards in the same time.
Materials wise we had card blanks, assorted craft papers in red, gold and green in a variety of finishes, Christmas rubber stamps, buttons, ribbons, Christmas shape cutters, bauble templates, scissors, glue, glitter glue, pinking shears, wooden shapes and metallic pens. We made a big pile in the middle of the table and shared our resources, using some items we already had and some that we bought specially. You can just see my overflowing ribbon tin (one of them!) and the plate of cake! It did not cost us a lot for materials which is always helpful!
Some of the images are a little dark, it has been so overcast and grey that it has been hard to take good photos. I have done my best with white sheets and lights, they are good enough to get the idea!
Here are some of the cards:
So simple! The left on has a background of flock paper (I love flock paper so much, I was overjoyed there was plenty in the pack), the right is a red glitter pattern. Cut them out with pinking shears and position centrally. Then add a wooden reindeer, bought from a craft shop in a pack of 4 for a couple of pounds. Done!
Button baubles. Choose your buttons, vibrant colours, pastel colours, all one colour, same size, different sizes, the choice and combinations are endless. a tip is to use flat bottomed ones as they stick better. Arrange your buttons first in a order and height arrangement that is pleasing. They look better at varied heights, like they are on different length ribbons. Then stick down and leave to dry. Use a metallic pen to draw on a ribbon or glue on real thin ribbon.
To make these cards I used a bauble template that my friend had drawn. I drew around the template onto a variety of different papers; gold glitter dots, red flock (yum yum), gold embossed, glitter snowflake etc. Cut out the bauble, put glue on the back, stick on the lower third of the card. Then draw on the hanging thread with metallic pen or use ribbon. This would work really well with any kind of Christmas shape - think bells, stars, trees, holly leaves, snowflakes, reindeer, string of lights, angels etc.
I couldn't resist these wooden deer, they are on the boundary of a bit kitsch for me but I really like them. They come with a self adhesive dot on the back so once you have chosen your background paper you just take the backing paper off the glue dot and stick them down. Really easy!
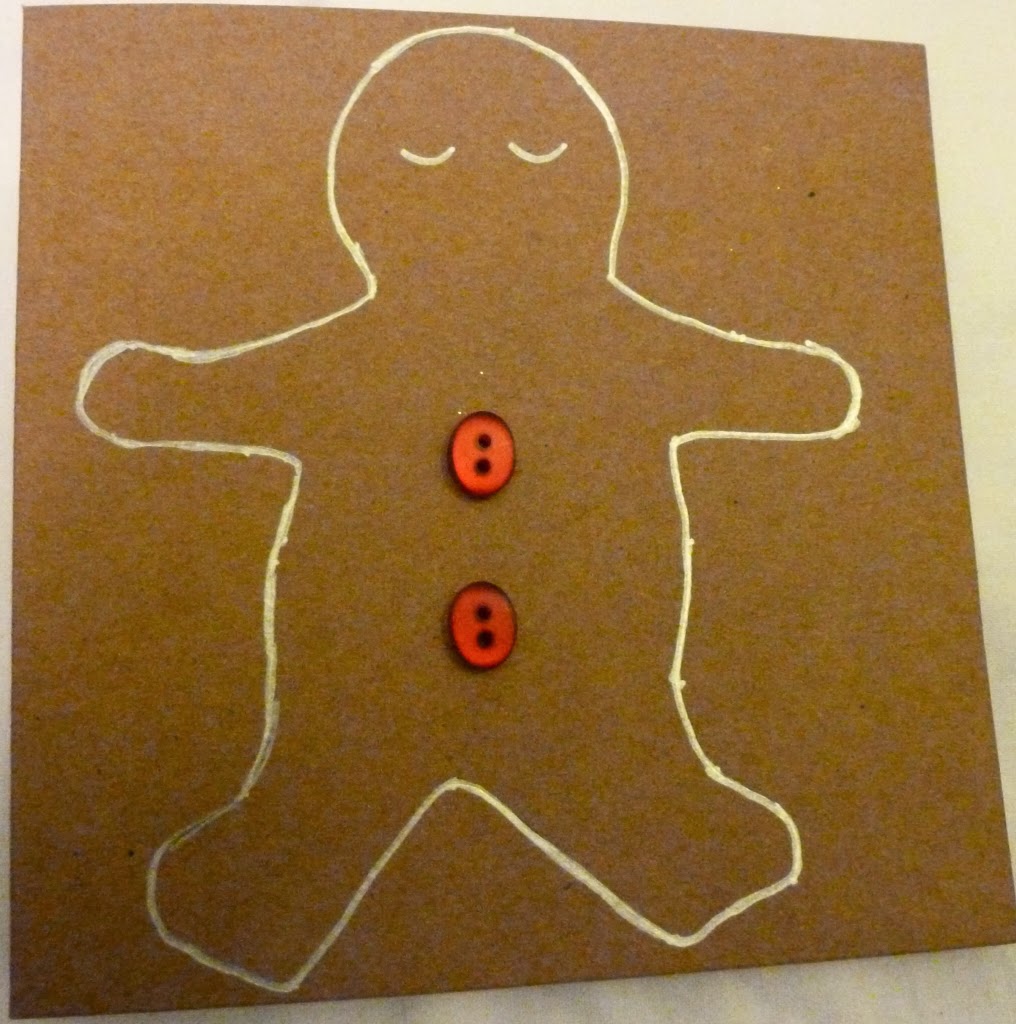
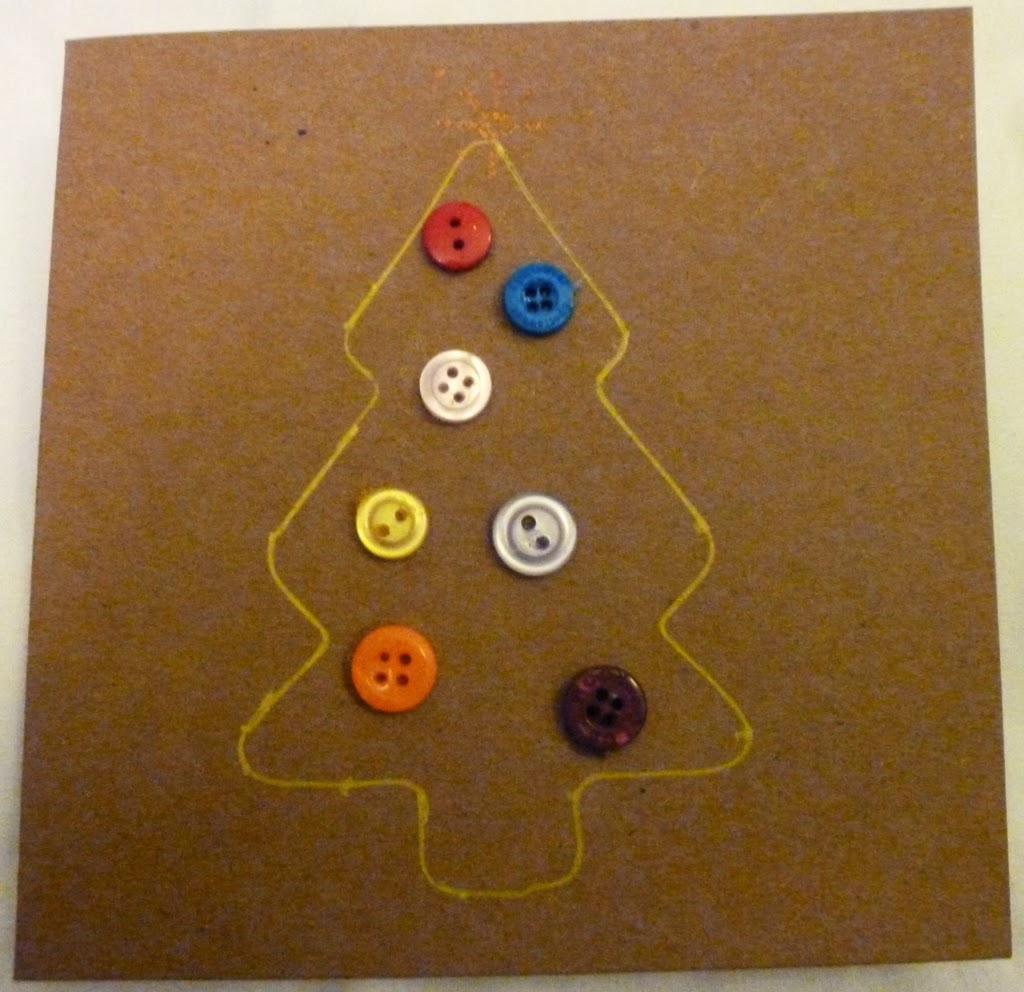
Grab yourself a festive shaped biscuit cutter and get making! Here I have drawn round a gingerbread man cutter and a tree cutter and then decorated them with lovely buttons. I used a star stamp for the top of the tree, start shaped buttons would also look good. Top tip - don't draw around the cutter with a metallic pen, it leads to smudging and bleeding lines no matter how carefully you do it. After several errors I had the genius idea of using a pencil to draw around the shape and then going over it with the pen. Hey presto! No mess. Sometimes primary school ways of doing things work well for a reason!
Like before, these wooden baubles are from a craft store and I thought they were really cute. They work well in odd numbered groupings and on a variety of backgrounds.
Here is my friend's lovely button tree. It looks so effective. She filled in the gaps with copious amounts of glitter glue so it is nice and sparkly too! It would be possible to draw outlines of other Christmas shapes and fill them in with buttons, simpler shapes are easier to deal with.
There we are, a selection of handmade Christmas cards that were fun to make, are effective and didn't take too long. We had so much fun, we laughed so much and enjoyed looking at each others creations and bouncing ideas of each other. I heartily recommend a lovely evening of making as a way of having a get together. In fact, we enjoyed crafty Tuesday so much that we repeated it a week later to make more cards. (Get well soon poorly friend who missed it).
Sunday, 1 December 2013
More vintage wedding photographs part two.
A few weeks ago I made a great find, all thanks to a friend. She had seen a couple of large vintage photographs on a market stall which I had missed and had to have when I went to look at them. Whilst paying I was in conversation with the seller who pointed me in the direction of the stall behind him. When I asked the seller there about vintage photographs she opened a trunk! That is right, a trunk! I had a very happy time going through the piles in that trunk, and had a hard time choosing my final selection, many of which will feature on here at some point. All today's photos are from that trunk. Thanks to my friend who kindly waited for me to finish despite the freezing weather and who held my dog's lead for a bit so I could have two free hands for treasure hunting!
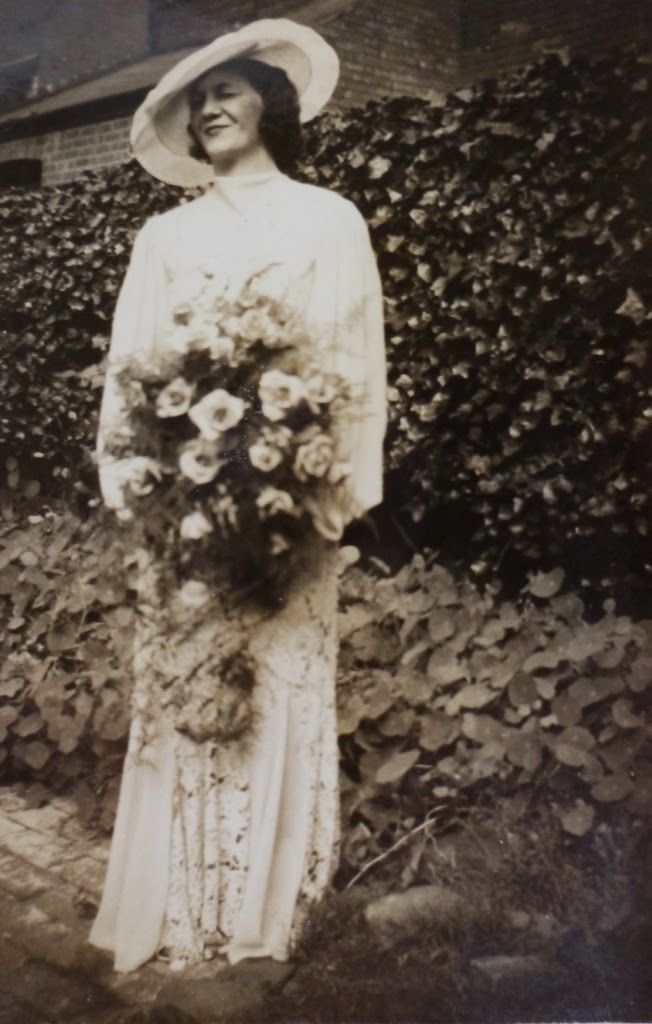
Here is today's first lovely bride. This is Joy, married September the 4th 1937. I love it when the photos have details written on their backs. If you look closely you can see that her dress has pretty lace inserts in the skirt. It is a very demure dress with the high neck, long sleeves and floor length skirt. I think the hat sets it off perfectly. I like the simplicity against the massive bouquet.
I am glad that we can see Joy's face a little more clearly here. We also get a good view of her lucky horseshoe. The bridesmaid's dresses appear to be lace with cute little collars and a row of tiny buttons down their centres. I like their posies, they appear to have large central flowers surrounded by a shaped paper cuff. Lovely hairstyles and headpieces too. The groom is very dapper, he is holding his white gloves in his free hand.
I was very pleased to find these two as both the bride and groom are wearing glasses! Read more about my favourite brides in glasses in this post. I think this dates from the 1940s. The bride is wearing a beautiful, long sleeved lace dress with a ruffle at the neck. Her veil is a stunning floor length one with an embroidered border. Her hair piece appears to be made from the same fabric as the dress. The groom as lovely striped trousers and a stripy tie. His shoes have a fantastic shine!
This looks to me like a mother and daughter waiting outside their front door with the bride's bouquet. I was hoping to match it to one of the brides in this set of photos but it is not quite right for any of them. Sadly, there is no way of knowing what was going on but I really like the photo. I think it is from the early 1940s. I love the daughter's dress, especially the trim around the border and the neckline. It looks like it may be embroidered. I think it is the pair of jaunty hats which really draw the eye in this photo.
Look at this lovely couple getting married in wartime. Also, another bride in glasses! The third thing that pleased me was that I found four of this couple's wedding photographs, it is so nice to have a set to look through. Obviously the groom is in uniform, with his cap tucked under his lapel?, and the bride is wearing what is probably her best suit. The two black patches look like applique in an inverted rain drop shape. Each nestles between two spirals of fabric decoration. Possibly they may be fur as may be her hat, making them all match together nicely.
Here they are with their tiny flower girl and one set of parents. The flower girl is wearing a dress trimmed at the cuffs and collar with either fur or something like angora. Look at the massive bow in her hair! The parents are very smart in their suits. The mothers has fur patches at the hips and the collar ties with beautiful fur pom poms. I have taken quite a liking to her handbag. I love ones with a top clasp opening, probably as I have happy memories of my grandma clicking hers open in the car to hand around sweets!
I love this group one. I think there are two sets of grandparents in here too. Everyone looks so smart and happy. I think it is a lovely photo. I wish I knew the names of this couple.
I have saved the best one of this group for last! This tinted photo is still in it's paper presentation mount so I had the joy of opening it up and finding this beauty. Assuming the colours are reasonably accurate gives a real feel for what they really looked like. I keep looking at it, I think it is gorgeous.
Moving into the 1950's for the next two couples. This is such a super photo, how very traditional wedding! Look at the groom's topper and waistcoat and slicked back hair. I can't begin to imagine how much net is in that bride's big dress but it looks amazing all stood out. The top two thirds is lace and it looks like she has a long sleeved bolero on. You can just see the string of pearls around her neck. Here it is obvious how fashions have changed from the previous decades, much shorter veil, much smaller bouquet, much bigger dress.
Isn't she a lovely bride in a gorgeous dress?! This picture was also inside a paper presentation mount so I was very excited as I looked inside. It is nice to see a side view to see more details of the dress, including how wide it is at the bottom. From here it is obvious that she does have a bolero on. I wish we knew what the bodice looked like underneath.
This next photograph is the last one from this set. All the rest of the pictures from the trunk are of things other than weddings so I will come back to them at a later date. I am not going to say much about this picture as I think it speaks for itself. I think the photographer has done a great job at capturing this couple's joy on their wedding day.
Subscribe to:
Comments (Atom)


