Showing posts with label sewing. Show all posts

Wednesday, 8 April 2015

If I could wear doll's clothes

I didn't mean to disappear for a whole month! I have been having the most frustrating laptop and Blogger issues and have been going round in slow, tedious circles trying to write my blog posts. I think and hope I have a solution and can now get back to writing posts again! 

If I could wear doll's clothes I know exactly what I would be wearing. I was flicking through the new Butterick patterns catalogue yesterday and found these:


Butterick have reproduced some of their vintage sewing patterns for doll's clothes. If these were in your doll's wardrobe she would be the best dressed ever! The designs are from 1946, 1954 and 1956 and there are some fabulous outfits that I would be very happy to wear myself.
Let us take a closer look.

The 1946 page of designs is my least favourite but I am very taken by this Little Red Riding Hood Cape and bonnet. I would happily skip about the nearest forest wearing this. Wolves? Pah!
If I got sick of my red cloak I would replace it with this gorgeous blue coat and bonnet set from 1954. The coat has a great swing shape and has pockets which is always a winner.
Also from 1954 is my favourite casual outfit, perfect for a teenage doll. Turned up high waisted jeans, checked shirt and matching shoes and hair bow. This is great inspiration for a casual '50's look.
From 1956 we have another fabulous casual outfit. I like the bows gathering the bottom of the Breton top and the matching capris. Nice shoes too.
This drop waist polka dot dress is lots of fun, I can imagine that skirt rustling with lots of petticoats. The matching sun hat is an added bonus.
We only get to see a glimpse of this red dress but it looks like it is decorated with floral braid which would be ever so pretty and a perfect diy if you own a red dress you are a bit bored of. The white coat could be quilted which would be marvellous and the matching bonnet is very cute.
You have to love a playsuit, especially a gingham one. The puffy shorts are pretty puffy but at least you have room to eat a big dinner!
This nightdress has a matching pair of puffy shorts. It makes me think of the sleepover scene in Grease which makes me want it all the more.
I wish we could see this gingham dress. I do like the co-ordinating trim on the hood of the swing coat.
This dress is adorable. Monochrome daisies trimmed with red ric rac and a red bow around the waist. A perfect daytime look.

I would definitely pair it with this red coat with the matching trim on the collar and the cuffs. I am coverting the top clasp structured bag too.
So, if I could indeed wear doll's clothes these are the outfits that you would find in my wardrobe. How about you?
   

Friday, 4 April 2014

Crafty Tuesday - egg cosies

Crafty Tuesdays came about some months ago when some friends and I decided that we would like to make some Christmas cards. We had so much fun, and so enjoyed adding some extra crafting into our week that we decided to make it a monthly thing. We tend to choose a theme, often seasonal, scout about for inspiration and patterns, use Pinterest to share ideas and then turn up at one of our houses with a bag full of fabric, yarn, needles, pins, thread, card, glue dots, scissors and ribbon and get crafty. We generally have a pizza and a chat, get done to some crafting, have tea and cake and do some more. This is how Crafty Tuesday's were born.

I realised after last week's Crafty Tuesday that although I have shared the results of these sessions in my Seven Snaps series and in the Simple Christmas cards post I have never shown one in it's entirety. So welcome to our Easter themed Crafty Tuesday where we made egg cosies. We are aware that they are, in essence, totally unnecessary, but they are pretty, cute, make nice gifts, quick and fun. So we don't care about necessity!


The original plan was to make felt egg cosies and to decorate them. This is M with her hot pink felt going straight into cutting it out with no template! Mantra - you can always cut it smaller but can't make it bigger.


J was inspired by some egg shaped felt decorations and decided to make her own version but turn it into a brooch. She cut out her shapes and appliqued them onto her egg shape. It was going to be stuffed and a brooch back attached.


I was all up for making felt cosies until I found this pattern in a knitting magazine. Then I decided that I needed these. This caused consternation to K, who fell in love with the woolly stripes whilst having lots of felt cosy plans.


I raided my stash beforehand and then chose my yarn from the pile I had bought along with me.


K decided to go with the knitted cosy and raided M's yarn stash without seeing my colour choices. Bit of a 'whoa' moment as they are freakishly similar.


M pinned her cosy into shape and tried it over the egg cup containing a creme egg that she had thoughtfully prepared earlier.


Stripes! My cosy in progress.


The past few Crafty Tuesdays have been interrupted ( in a good way) for The Great British Sewing Bee as we are all avid watchers. This week it also involved a bit of a house swap. Crafty Tuesday was at M's house. Her television is normal sized to small. M lives a few doors down from K. Her television is normal to large. So at 8pm we gathered up our craft projects (not necessarily what we had been making) and nipped out to K's house. We did laugh as we scuttled down the street without our shoes properly on, trailing yarn.


We love the Great British Sewing Bee. The final is on Tuesday. Very excited!


K had made a yummy pineapple upside down cake. Old school pudding's are just the best. We continued with our alternate craft projects. We had to do this so that GBSB could get our full attention!


J hand stitching her Regency style apron, made without a pattern! Clever! She was getting it ready for a re-enactment event. M was knitting a lovely sock. K was knitting cute heart bunting. I was knitting my cosy.


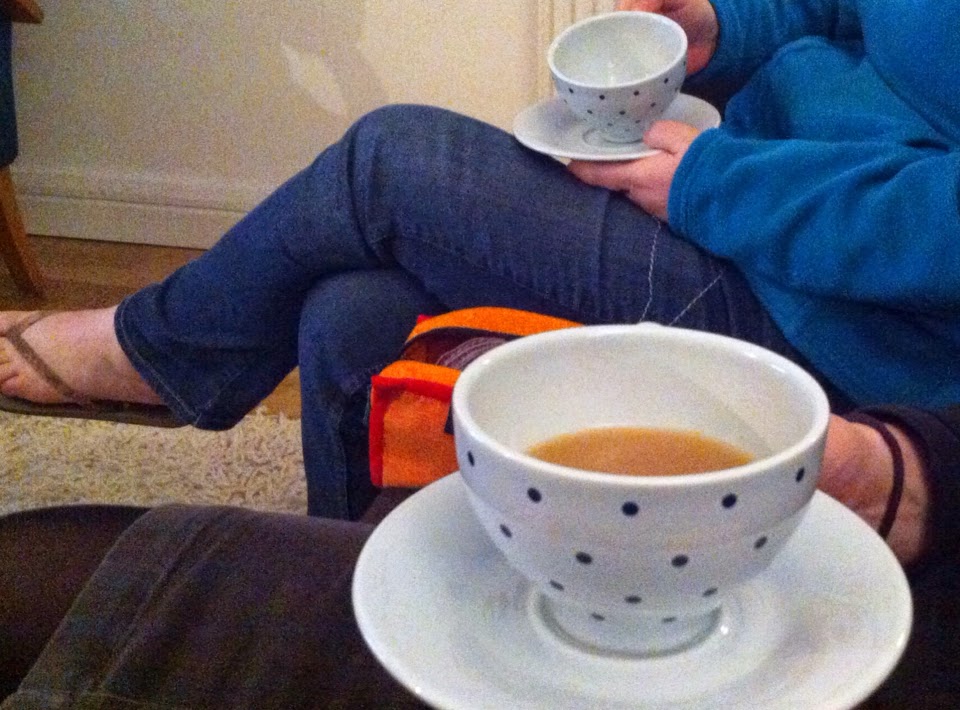
A lovely cuppa! Crafting is so very often fuelled by tea. (and cake, but we won't go into that)!


GBSB finished we packed up and went back to M's. This is my finished cosy before being stitched together and before the darning in of those pesky yarn ends.


M's finished felt cosy. It is decorated with a strip of polka dot fabric, cut out with pinking shears and tied in a bow. So jolly!


My finished cosy! I was very pleased with its woolly stripeyness.


The top of the cosy is stitched together to create this pretty effect.

I can't wait for the the next instalment of Crafty Tuesday!

Sunday, 3 June 2012

Inside my Mother's wardrobe

Now, I should probably start by saying that whilst my mum wears lovely clothes and is perfectly stylish it is not her current wardrobe that I wish to talk about. I want to focus on part of her wardrobe from the early 1970s, when she was in her early 20s and had moved from a small rural town down to London.

I would have liked to know my mum as a teenager. From old photographs I can see that she was fashionable - hair in the latest style, on trend clothes, fancy shoes. Like many people who didn't have lots of money to spend on their appearance my mum made many of her clothes. I have heard stories of many of the dresses and seen photos (which I can't post here until I've asked her if she would mind)! If she agrees I will follow up this post with more pictures. I love the fact that she sat and looked through fashion magazines and browsed in shops for inspiration and then just went home and made it herself. She has a collection of Golden Hand magazines which we have looked through together discussing what she made. I bought one from a charity shop a few weeks ago which featured a Vogue wedding dress pattern. This turned out to be the pattern she used to make her own wedding dress!

Mum has recently decided to part with some of her clothes from the 70s. Both my sister and I would love to wear them but there is one small (literally) snag. Mum was clearly absolutely tiny, one of her skirts will not quite do up around my thigh and where her rib cage used to go I really don't know! I have tried to take pictures of a high quality but am hampered by the fact that no one I know can fit the clothes to model them and I don't have a dressmaker's dummy to display them on either. I still think they are worth a look.

Stirling Cooper two-piece, floral print on black.
Shirt shoulders gather and tie.
Skirt has shirred front panel and ties at the sides.
Fabulous red buttons.
Bought in 1976/7.
Mum wore this whilst pregnant with me!


 Halter neck bandeau top and floral and pink denim panelled skirt.
Handmade by mum in 1974/5.
Worn to many parties and dances on river boats on the Thames. 


Close up of the floral fabric.


Long sleeve tie front dress .
Bought from Wallis in Oxford Street in 1976.

 Close up of the fabric, a mixture of ditsy florals, paisley and folk print.


 Orange wheat ear brocade dress by Eastex.
This is actually a 1960s dress which Mum bought in the 1990s.
I had to include it as it is beautiful.


A close up of the amazing buttons and embroidery.
I love this fabric, I wish this dress fitted!


 Red squiggle chiffon floor length dress.
Bought in a boutique off Victoria Street, London, in late 1976.


Close up of the fabric.
It is sheer so Mum made a long red slip to go under it.
She wore this whilst 3 months pregnant with me!


Mum wore this dress to The Royal Marsden charity fund raising ball at Quaglinos in London's West End. The cabaret artist was singer/comedienne Joan Turner who was a little worse for wear and not on top form. Several men began a protest by getting under their tables, lifting them above their heads and advancing on the artist. During this bread rolls started flying towards the stage. An appeal for order was made by Danny La Rue and Ava Gardiner who managed to rescue Joan Turner!

One of the things I love about vintage clothes is the idea of the life they may have led before they became part of mine. I always imagine the type of woman who owned my dress before and the events and occasions they would have been to together. I love that tangible link with history. Its a shame the garments can not speak and tell all their tales. This is one of the reasons I am so interested in my mum's clothes as she can tell me all about them.

Monday, 21 May 2012

How to make a 1940s floral accessory

Recently I had a craft day with a friend. Sometimes it is great to craft on your own as your mind is free to roam and be creative. But, I also enjoy crafting with others - its sociable, you can exchange ideas, swap techniques, add moral support or cups of tea through disasters and you get to be nosey and see what others are making. My friend made lots of beautiful items for her home - storage bags and boxes, a table runner and cushions.

I was inspired by a 1940s pattern that I have for leather accessories. It features a bag, cap, purse and a gorgeous carnation. I was thinking about how 1940's women always accessorised their outfits well, often out of necessity as buying new was not always an option. So I decided to make some carnations to brighten up dresses, cardigans, hats, bags, as buttonholes or perhaps just to put in a jug on my desk. I have used felt, as women at that time often did.

On plain paper I drew 2 grids, one 2" by 3" and one 3" by 4". I have used inches as I wanted to make my flower to its original dimensions. I used these grids as a guide to draw my petal and calyx templates. You could draw these by hand and could also change the shape and size.


Once cut out I pinned each pattern piece to the felt. Each carnation needs one calyx and 12 petals. I cut round the template rather than draw round it so that no marks would be on show on the finished carnation. I used pinking shears round the petal top as carnations look a bit feathery, you could also cut a fringe or leave it plain.
Next, take one petal and roll it into a tube. I secured it at the bottom with a few stitches. Then cut 2 petals in half leaving a join at the bottom. Position these around the tube and stitch in place when you are happy with the result.


The next stage is trial and error as this gives the final shape of your flower. The petals need to be added one by one, keep checking to see that you like the shape that you are producing. You can hold them together or add a couple of stitches every few petals.


Leaving 5cm free at each end I then tightly wound a 36cm length of florist's wire around the base of the flower. You can rearrange your petals as you do so.


Twist the ends of the wire together to form a short stem. Position the calyx so that it covers the bottom third of the petals and all of the wire stem. The calyx piece needs to be tightly wrapped around the stem. I used a dot of glue to attach the calyx to the petals, then stitched it down the stem. You could also cut a leaf shape from the felt and stitch it to the stem.

That's it! One carnation made. Now all you need to do is decide what to do with it!